
Integration Preview Overview
Preview Capabilities
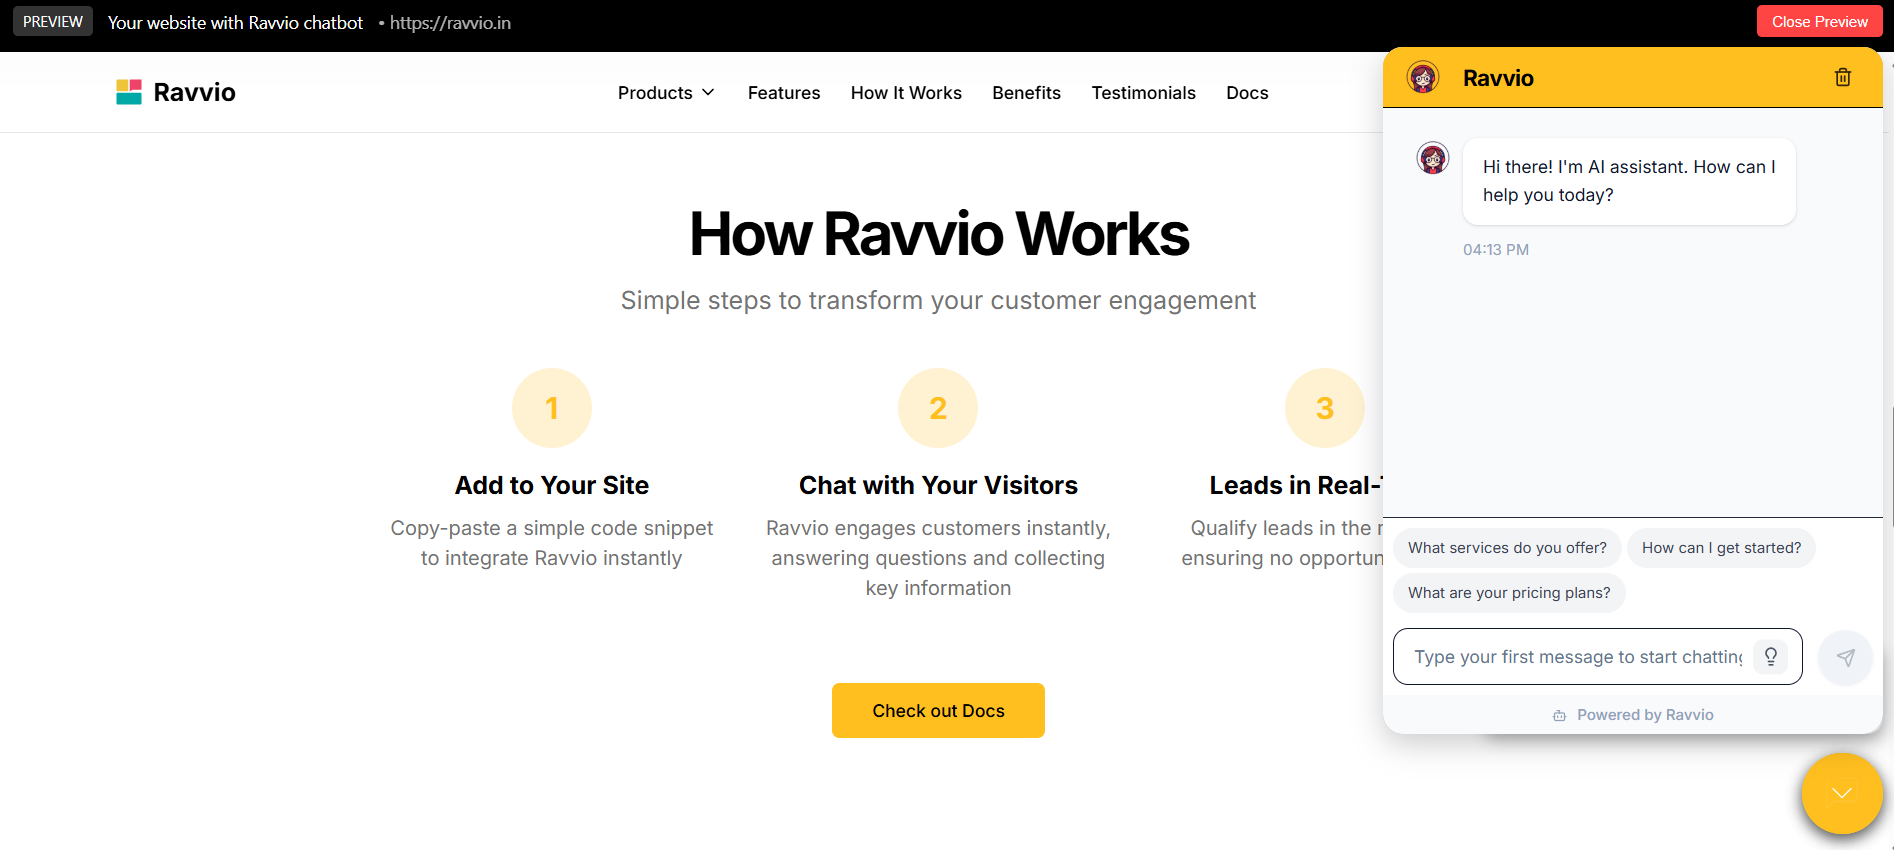
Live Preview
Real-time demonstration of your chatbot widget appearance and behavior
Interactive Testing
Full functionality testing in a controlled preview environment
Multi-Device Views
Preview across desktop, tablet, and mobile device layouts
Performance Validation
Loading speed and functionality verification before deployment
Live Preview Features
Real-Time Widget Demonstration
Visual Preview Interface
Visual Preview Interface
Preview Environment:
- Accurate representation of how widget appears on your website
- Real-time updates reflecting configuration changes
- Interactive preview window with actual functionality
- Realistic website background simulation for context
- See exactly how widget will look before deployment
- Test visual appeal and brand integration
- Validate user interface design and layout
- Ensure professional appearance and functionality
Configuration Sync
Configuration Sync
Real-Time Updates:
- Immediate reflection of all customization changes
- Synchronized appearance and behavior modifications
- Live preview of color, position, and size adjustments
- Real-time validation of custom messaging and content
- Test different configurations without deployment
- Compare multiple design options side by side
- Validate changes before committing to live website
- Iterate quickly on design and functionality improvements
Interactive Testing Environment
Full Functionality Testing
Complete Feature Validation:
- Test all chatbot interactions and responses
- Verify lead capture forms and data collection
- Validate demo booking integration functionality
- Confirm proper error handling and edge cases
Conversation Flow Testing
Interaction Validation:
- Test typical user conversation scenarios
- Verify agent response quality and relevance
- Validate conversation flow and user experience
- Test integration with knowledge base content
Multi-Device Preview
Desktop and Mobile Views
Desktop Experience
Full Desktop Testing:
- Standard desktop browser simulation
- Mouse interaction and hover effects
- Complete feature functionality
- Professional appearance validation
Mobile Experience
Mobile Optimization:
- Touch interface interaction validation
- Responsive design verification
- Mobile-specific feature testing
- Cross-platform compatibility
Performance Validation
Loading Speed Assessment
Loading Speed Assessment
Performance Metrics:
- Widget initialization and loading time
- First interaction response time
- Resource loading efficiency
- Network request optimization
- Bottleneck identification
- Resource usage recommendations
- Caching strategy effectiveness
- Network efficiency improvements
Functionality Verification
Functionality Verification
Core Features:
- Chat interface opening and closing
- Message sending and receiving
- Agent response accuracy
- Lead capture functionality
- Demo booking integration
- Interface navigation and usability
- Visual feedback for user actions
- Response timing and expectations
- Accessibility compliance
- Cross-browser consistency
Code Examples and Implementation
Copy-Ready Integration Snippets
JavaScript Widget Implementation
Standard Integration Code:Customization Parameters:
- Replace ‘your-agent-id-here’ with your actual agent ID
- Set ‘data-primary-color’ to match your brand colors
- Configure ‘data-position’ for optimal placement
HTML/CSS Bubble Implementation
Lightweight Alternative:Benefits:
- Minimal JavaScript dependencies
- Fast loading and lightweight
- Easy CSS customization
- Modern browser compatibility
Installation Instructions
WordPress Installation
Theme Integration:
- Add code to theme’s footer.php file
- Use WordPress plugin for easier management
- Ensure caching plugin compatibility
- Test with different themes
Other Platforms
CMS Integration:
- Shopify: Add to theme.liquid template
- Wix: Use HTML embed widget in footer
- Squarespace: Add to footer injection
- Custom sites: Place before closing body tag
Troubleshooting Guides
Common Integration Issues
Widget Not Displaying
Widget Not Displaying
Troubleshooting Steps:
- Verify script placement before closing body tag
- Check browser console for JavaScript errors
- Confirm agent ID is correct in integration code
- Disable ad blockers temporarily
- Clear browser cache and reload page
- Incorrect script placement in HTML head
- JavaScript conflicts with other scripts
- Ad blockers preventing widget loading
- Incorrect or missing agent ID
- Network connectivity issues
Functionality Problems
Functionality Problems
Resolution Process:
- Test in different browsers (Chrome, Firefox, Safari)
- Verify internet connectivity and API access
- Check for conflicting CSS styles
- Validate configuration parameters
- Review browser developer tools for errors
- Slow loading due to large page resources
- Network latency affecting responses
- Conflicting JavaScript libraries
- CSS interference with widget appearance
- Mobile device compatibility issues
Best Practice Recommendations
Implementation Guidelines
Optimal Integration:
- Always place script before closing body tag
- Use async loading to prevent page blocking
- Implement proper error handling
- Test across multiple browsers and devices
Performance Optimization
Speed and Efficiency:
- Minimize impact on page loading speed
- Use CDN for optimal resource delivery
- Implement proper caching strategies
- Monitor resource usage regularly
Advanced Preview Features
Performance Validation
Speed Testing
Performance Metrics:
- Widget loading and initialization times
- Response times for user interactions
- Resource usage and optimization
- Network efficiency measurements
Optimization Insights
Improvement Areas:
- Loading speed optimization opportunities
- Resource usage reduction strategies
- User experience enhancement suggestions
- Performance benchmarking data
Testing Methodology
Comprehensive Testing Protocol
Comprehensive Testing Protocol
Systematic Validation:
- Test all customization options and configurations
- Validate functionality across device types
- Verify performance under different conditions
- Confirm accessibility and usability standards
- Establish performance baselines
- Compare against industry benchmarks
- Monitor improvements over time
- Document best practices
User Acceptance Testing
User Acceptance Testing
Real-World Validation:
- Gather feedback from users and stakeholders
- Test with diverse user groups
- Validate business objectives
- Ensure brand alignment
- Regular testing cycles
- Performance monitoring
- User feedback integration
- Strategic alignment reviews
Preview Accuracy: The preview environment provides an accurate representation of how your widget will appear and function on your live website.