
Login Methods Overview
Ravvio provides two convenient ways to access your account: email/password login or Google OAuth integration, both providing immediate access to your personalized dashboard.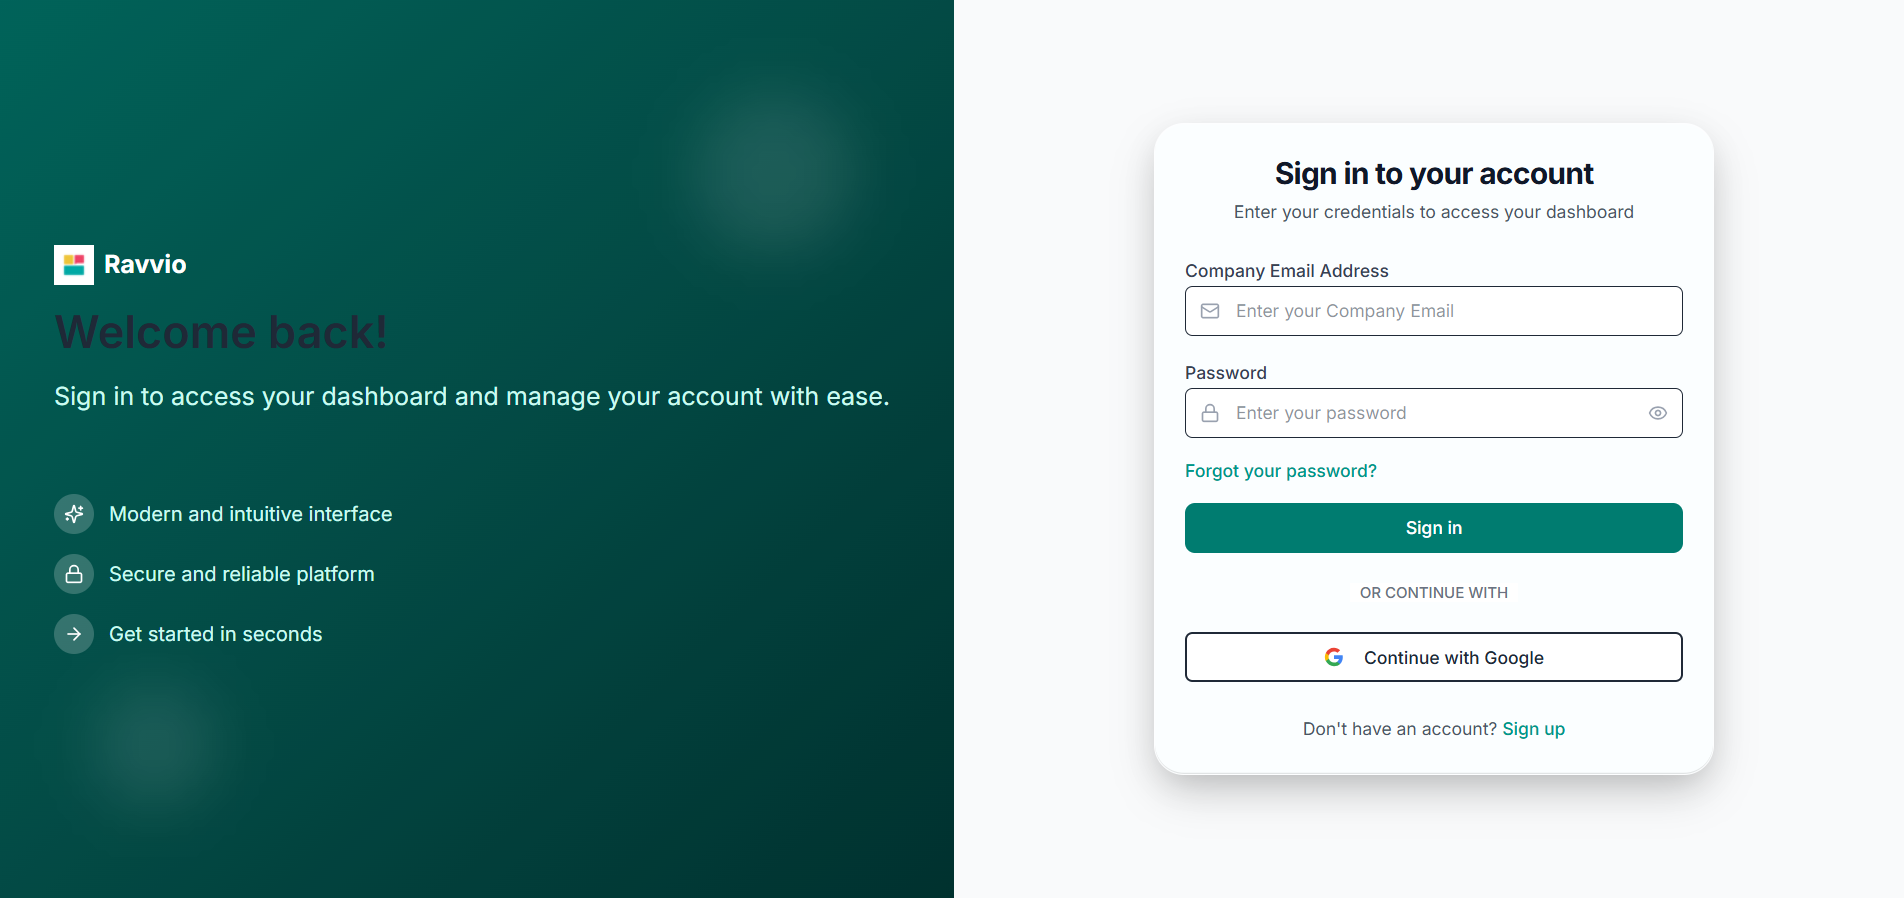
Available Login Options
Email & Password
Traditional LoginUse your registered email and password for secure access
Google OAuth
Quick AccessSign in instantly using your Google account credentials
Email & Password Login
Login Process
Access Login Page
Navigation:
- Visit the Ravvio login page
- Enter your registered email address
- Provide your account password
- Click “Sign In” to authenticate
Account Verification
System Authentication:
- System verifies email exists in database
- Password validated using secure hashing
- Account status and permissions checked
- Authentication token generated for session
Agent Verification
Automatic Setup Check:
- System ensures user has default agent created
- Creates agent if none exists (automatic fallback)
- Verifies agent configuration and accessibility
- Prepares dashboard with agent information
Login Validation
Email Verification
Email Verification
Authentication Process:
- Email address must match registered account exactly
- Case-insensitive email matching for user convenience
- Database lookup for existing user account
- Error message for non-existent accounts: “Invalid email or password”
- Prevents email enumeration with generic error messages
- Secure database queries with proper sanitization
- Rate limiting to prevent brute force attempts
- Session security with proper token management
Password Validation
Password Validation
Secure Authentication:
- Password compared against stored bcrypt hash
- No plain text password storage or transmission
- Secure hash comparison using industry standards
- Same generic error message for security consistency
- Generic error message: “Invalid email or password”
- No indication whether email or password was incorrect
- Protection against account enumeration attacks
- Consistent response times regardless of failure reason
Google OAuth Login
OAuth Authentication Flow
Google Authentication
OAuth Process:
- Click “Continue with Google” button
- Redirected to Google OAuth consent screen
- Authenticate with your Google account
- Authorize Ravvio to access basic profile information
Account Resolution
System Processing:
- Google returns user profile data (name, email, Google ID)
- System checks for existing account with Google provider
- Validates OAuth token and user information
- Determines login vs new account creation scenario
Login Scenarios
Existing Google User:
- Direct login if Google ID matches database record
- Immediate dashboard access with full functionality
- No additional verification required
- Same email with different provider shows appropriate message
- Clear guidance on using correct authentication method
- Security protection against account takeover attempts
OAuth Security Features
Secure Authentication
OAuth 2.0 Security:
- Industry-standard OAuth 2.0 implementation
- Secure token validation and verification
- No password storage required for OAuth users
- Google-managed authentication security
Account Protection
Identity Verification:
- Trusted provider authentication
- Secure profile information exchange
- Protected against credential stuffing
- Automatic security updates from Google
First Login Experience
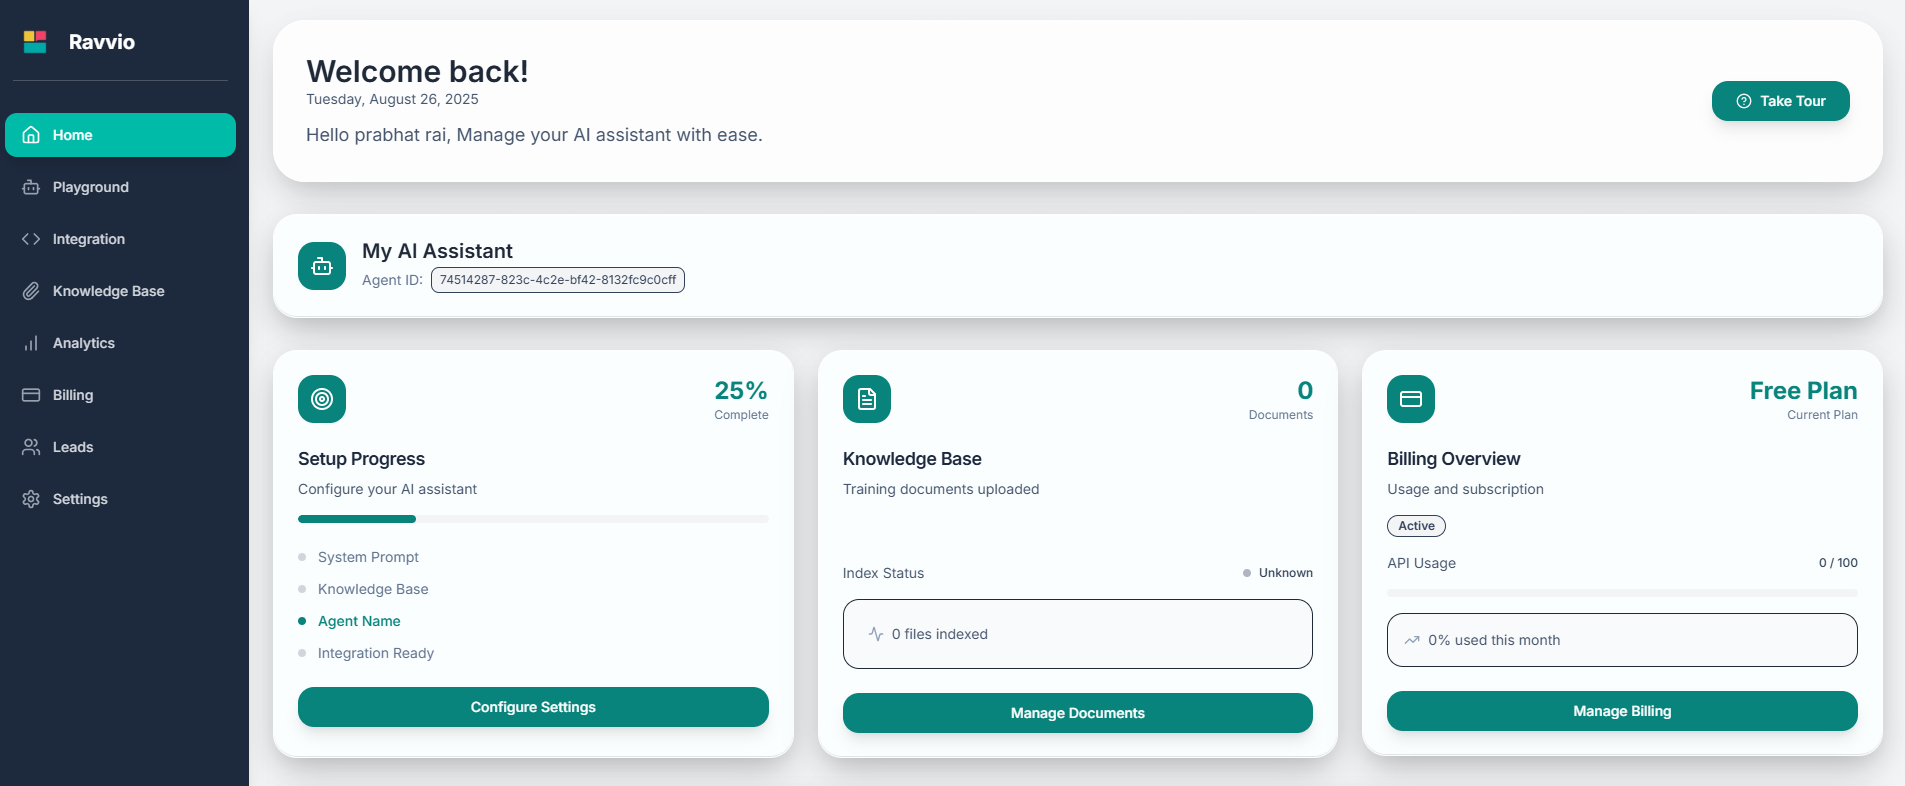
Dashboard Overview
Upon successful first login, you’ll be welcomed with:Welcome Dashboard
Welcome Dashboard
Personalized Interface:
- Personalized greeting with your name and current date
- Quick overview of account status and setup progress
- Direct access to key platform features and tools
- Navigation guide for new users
- Agent status card with configuration overview
- Setup progress tracker showing completion status
- Quick action buttons for common tasks
- Recent activity and usage statistics
Default Agent Setup
Default Agent Setup
Automatic Agent Creation:
- Pre-created AI agent named “[Your Name]‘s Assistant”
- Unique agent ID generated for integration purposes
- Basic configuration ready for customization
- Integration code available for website deployment
- Agent name and configuration status
- Setup completion indicators
- Direct links to customization settings
- Integration readiness status
Setup Progress Tracker
Your dashboard includes a comprehensive progress tracker: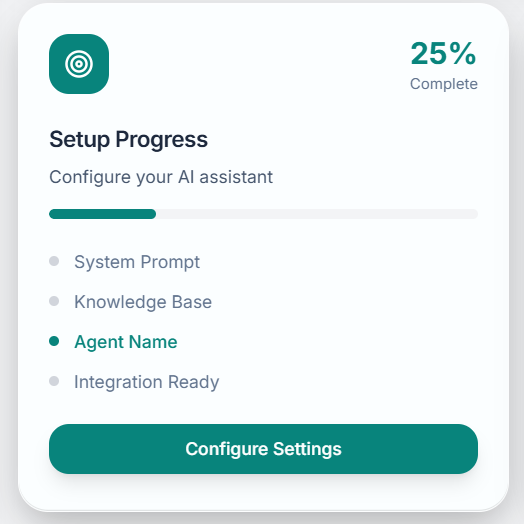
System Prompt Configuration
Status: Usually incomplete on first login
Action Required: Customize AI behavior, personality, and response style
Impact: Determines how your agent interacts with website visitors
Knowledge Base Setup
Status: Empty by default
Action Required: Upload relevant documents to train your agent
Impact: Enables accurate, context-aware responses to user queries
Agent Customization
Status: Set to default “[Your Name]‘s Assistant”
Action Required: Customize name to match your brand or purpose
Impact: Affects user recognition and brand consistency
Platform Navigation
Main Navigation Sections
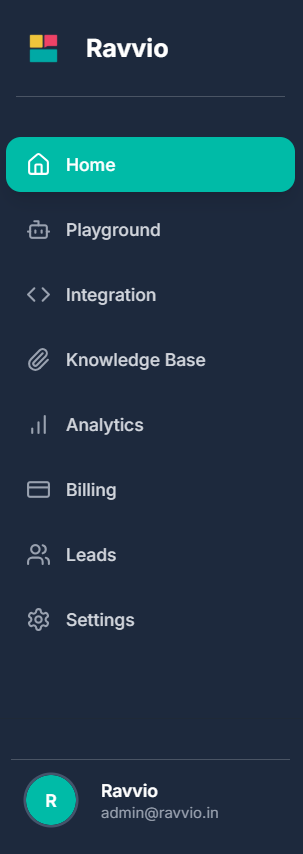
| Section | Purpose | Key Features |
|---|---|---|
| Dashboard | Overview and quick actions | Progress tracking, metrics, quick access to common tasks |
| Knowledge Base | Document management | Upload, organize, and manage training content for your AI |
| Playground | Testing environment | Test conversations and refine agent responses safely |
| Analytics | Performance monitoring | Usage statistics, conversation insights, and metrics |
| Integration | Deployment tools | Get embed codes, customize widget appearance |
| Billing | Subscription management | Monitor credit usage, manage plans, view billing history |
| Leads | Lead management | Configure capture settings, manage lead database |
| Profile | Account settings | Personal information, notifications, security settings |
Quick Actions Available
Immediate Actions
Ready to Use:
- Access playground for testing
- View integration code
- Upload first knowledge base documents
- Customize agent appearance and behavior
Setup Tasks
Configuration Options:
- Complete system prompt setup
- Organize knowledge base structure
- Configure lead capture settings
- Plan website integration strategy
Account Features & Limits
Free Account Benefits
Your account starts with:Credit Allocation
Credit Allocation
100 Free Credits:
- Each AI message response consumes one credit
- Plenty of credits for testing and initial configuration
- Credit usage tracking in billing section
- Upgrade options available when credits are consumed
Platform Features
Platform Features
Full Feature Access:
- Complete agent customization capabilities
- Unlimited knowledge base document uploads
- Full playground testing environment
- Analytics and performance monitoring
- Lead capture and management tools
Recommended First Steps
Priority Configuration Tasks
Complete Platform Orientation
Initial Setup:
- Take optional guided tour if available
- Familiarize yourself with main navigation sections
- Review dashboard components and quick actions
- Understand setup progress tracker requirements
Configure System Prompt
Agent Personality:
- Define your agent’s role and expertise
- Set appropriate tone and communication style
- Include business context and key information
- Test different prompt variations in playground
Build Knowledge Base
Content Upload:
- Upload relevant business documents
- Organize content by topic or category
- Test agent responses with new knowledge
- Refine content based on testing results
Support and Resources
Built-in Help
Available Resources:
- Tooltips and help text throughout interface
- Context-sensitive guidance and tips
- Setup progress indicators with explanations
- Error messages with actionable solutions
External Support
Professional Assistance:
- Comprehensive documentation library
- Email support: sujay@ravvio.in
- Response time: Usually within 24 hours
- Personalized assistance for setup questions
Session Security: Your login session remains active as long as you’re using the platform. For security, always log out when using shared computers.